

How to Adjust Girder Fork Spindles

Updated: Aug 20
Correctly adjusted girder forks can transform the way a classic motorcycle rides. This guide explains how to adjust Webb-type girder fork spindles to remove side play while maintaining free movement. The method shown applies to Norton, Triumph, Velocette, Scott and many other motorcycles fitted with Webb-style girder forks.
Unsurprisingly you will never get a set of worn out forks to perform as well as a set in good order, so the steps laid out in this page should only be used once you are happy that spindles and bushes are all as they should be. If they are not, I would advise you to read our other pages on Girder Fork Repairs before continuing.
Webb-Type Girder Forks
The forks used for the photos on this page are from a 1939 Norton. All Norton girder forks were essentially the same from 1932 until the introduction of Roadholders in 1947. As well as these, the steps outlined here will also work on:
Pre-1932 Nortons with Webb girder forks including:
CS1
ES2
Model 18
16H
Early Scotts
All girder fork Triumphs from the late 1920s, 1930s and 1940s
All girder fork Velocettes from the late 1920s, 1930s and 1940s
Many others, if your forks look similar to the ones photographed on this page, this method will almost certainly work.
The Tools You Will Need
Adjusting girder forks can be done entirely with an adjustable spanner. I would, however, always prefer to use the correct tools for the job. Ideally you need:
A spanner for each locknut
A square drive such as the one in this photo. On the Norton spindles used in this example the square is 3/8" across flats. This does vary and is the only part of the job for which I would consider using an adjustable spanner.

Adjusting Girder Fork Spindles
The aim when adjusting girder fork spindles is to allow free movement up and down with no side play. The girder forks we are dealing with here are fitted with knurled washers (shown in green on the drawing) to check for this. When properly adjusted these should be free to rotate but should not 'wobble' from side to side.
We achieve this by adjusting the distance between the two fork links. The spindle itself is threaded into one link (on the right in the drawing below) so it can be moved in or out. The other link (on the left) is then clamped hard up against a shoulder with a nut. The whole assembly is then locked in place with the locknut next to the threaded link.

1) Slacken the Locknut Next to the Square
This is the locking nut mentioned above and as such is the first to slacken and the last to tighten.

2) Slacken the Clamping Spindle Nut
This nut clamps the non-threaded fork link up against the shoulder on the fork spindle. You'll need to slacken it off to allow the fork spindle to rotate.
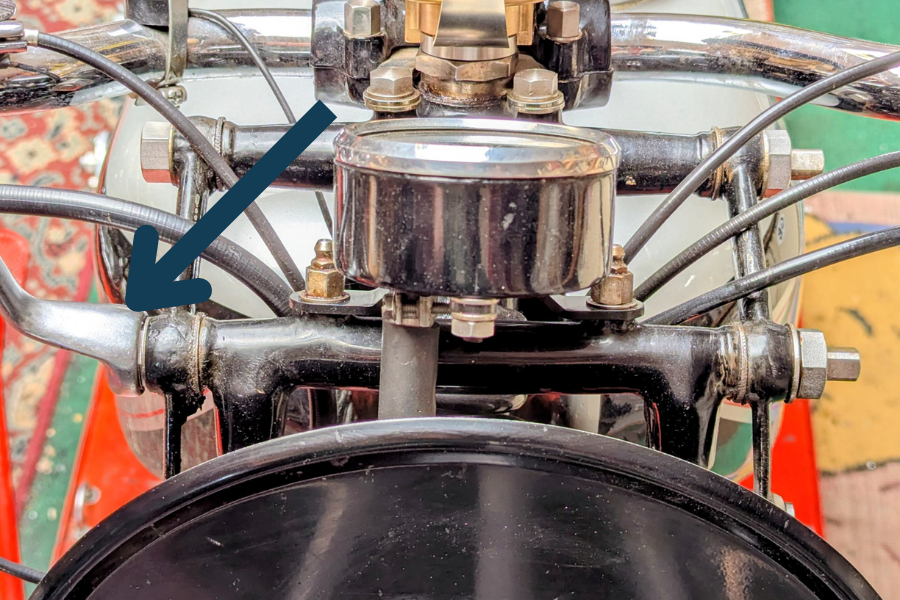
3) Rotate the Fork Spindle
Using the square on the end of the fork spindle to adjust the side play.
Turning the fork spindle anti-clockwise will move the threaded link in and reduce side play
Turning the fork spindle clockwise will move the threaded link out and increase side play
Leave a little bit of side play on the washer before tightening up the clamping nut as this will close the links in slightly more. You might need to repeat this process several times, tightening and slackening the clamping nut to get it right.
4) Tighten and Check
Once the knurled washers rotate but do not move from side to side with the clamping nut tightened up, fully tighten both the clamping and lock nuts before checking the knurled washers for a final time.
In theory both knurled washers should be free to rotate. However I have found that with freshly re-assembled forks, this isn't always easily achievable. I would settle for one tight washer and one that rotates freely on initial assembly. It is then important to check them after each of the first few rides as everything settles down slightly.

What Would You Like to Do Next?
Shop for Girder Fork Parts
Learn more about Girder Fork Repairs
Read about the Norton International used for these pictures
Return to Girder Forks
Return to Technical
Comments